sixteen-bit
Member
It totally plastic. Would need a metal base to justify that price imo. It just feels so cheap.Fightstick Alpha is $55 on Amazon right now.
http://www.amazon.com/dp/B018HXA6H8/?tag=neogaf0e-20
Worth it?
Maybe worth $35
It totally plastic. Would need a metal base to justify that price imo. It just feels so cheap.Fightstick Alpha is $55 on Amazon right now.
http://www.amazon.com/dp/B018HXA6H8/?tag=neogaf0e-20
Worth it?
Depends on whether you need native PS4 support or not. Otherwise, there are much better sticks available around that price point.Fightstick Alpha is $55 on Amazon right now.
http://www.amazon.com/dp/B018HXA6H8/?tag=neogaf0e-20
Worth it?
Fightstick Alpha is $55 on Amazon right now.
http://www.amazon.com/dp/B018HXA6H8/?tag=neogaf0e-20
Worth it?
Finished my fight stick build tonight! It was quite the experience. I've never done any wiring work, so stripping the wires and crimping the quick disconnects was an experience to say the least. I opted to daisy chain grounding wires which in my haste and inexperience, I screwed up more than once. Let me just say I was happy that I ordered extra terminals; I needed 'em!
Got all of the grounding wires in place for the start, select/back, home and all eight buttons in place.
Measured, cut, crimped and attached all of the signal wires, mounted the PCB and put the bottom frame piece back on.
Top view after I put the mirrored bottom back on. I'm actually really pleased with the look, wire jungle and all. Looks like 80's high tech! The silver USB cable inside was kind of a happy accident. We recently got a wireless printer so I didn't need the cable for my desktop computer anymore.
Plugged it into my 360 and was pleasantly surprised by the blue LED. I had no idea the Universal Fighting Board had any on it. Looks really cool and dramatic with the mirrored bottom and clear top.
Glamour shot of my new stick!
For anyone curious, this is the stuff I used:
- TEK Case Series 1B
- Brook Universal Fighting Board PCB
- Hori Hayabusa joystick
- Sanwa Denshi OBS series push buttons (30mm and 24mm)
- Neutrik USB pass-through
Finished my fight stick build tonight! It was quite the experience. I've never done any wiring work, so stripping the wires and crimping the quick disconnects was an experience to say the least. I opted to daisy chain grounding wires which in my haste and inexperience, I screwed up more than once. Let me just say I was happy that I ordered extra terminals; I needed 'em!
When all was said and done, I'd say 3-4 hours. Assembling the case was a little tricky, I was being very careful with it. And things were really slow-going while I got the hang of the wiring work. They picked up after that though.Good stuff man. Really like how it turned out. How many hours of work did you put into it?
Thanks!Looks awesome! Well done.

Finished my fight stick build tonight! It was quite the experience. I've never done any wiring work, so stripping the wires and crimping the quick disconnects was an experience to say the least. I opted to daisy chain grounding wires which in my haste and inexperience, I screwed up more than once. Let me just say I was happy that I ordered extra terminals; I needed 'em!
For anyone curious, this is the stuff I used:
- TEK Case Series 1B
- Brook Universal Fighting Board PCB
- Hori Hayabusa joystick
- Sanwa Denshi OBS series push buttons (30mm and 24mm)
- Neutrik USB pass-through
Some of my bottom buttons stick down some time on my fightstick? Should I try cleaning them with rubbing alcohol? I'm thinking maybe when I was eating food while playing games some crap got stuck between the buttons.
The only places that felt like a tight fit were the front buttons, especially if I added the weight slots. I left them out for now because of the space concerns. It didn't help that I never found a super short USB cable to run from the PCB to the Neutrik port. Ended up using an old one I had lying around that I had to zip tie into a loop.I bought the same case and installed a brook Universal in it as well, will post pics tomorrow. Its a nice case but a tight squeeze inside for wires.
Speaking of wires what is the name of the wire covers I see ppl using and the size of them? They use it to cover the wires for a cleaner look and protection I assume?
rubbing alcohol would work, also take apart the button (not microswitch) and clean the sides of the push button and what not. works for me, usually have a lot of grime under them from sweaty hands heh


Added stickers from the 3D Classics Collection
GummoHey all, can anyone suggest some reputable stick modders in the US? I've had no luck with the few contacts I've tried for the mods I want. Much appreciated.
Hey all, can anyone suggest some reputable stick modders in the US? I've had no luck with the few contacts I've tried for the mods I want. Much appreciated.
Despite cleaning my buttons with rubbing alcohol, they still stick at times.Does this mean it is time for new buttons? If so where do I by them and does the quality matter as long as they are Sanwa?
 .
.Are you taking them apart and getting inside the plunger?
How old are they?
Like inside from the top with a brush?
1 year.
")
Has anyone in this thread had experience with both the TES+ and the TE2+? I recently switched to the TE2 and the buttons feel stiffer to me? They don't sound as "clicky" either and I feel this might be messing up my execution...
They use the same parts so you are most likely feeling the difference between the cases. The TE2+ feels a little different because it opens up.it doesn't feel as "solid" in my opinion if you understand what I mean.
Gummo
Thank you kindly.Gummo from gummowned.com and Victor from vickomods.com
if it was just the brooks universal I would suggest doing it yourself. Its surprisingly easy, and the only tools you need are a small flat head and a wire stripperThank you kindly.
Hopefully it works out, I'd like to get a brooks universal board installed plus a separate db15 out for neogeo and supeguns. But I'm afraid I may go bankrupt on the road o arcade stick glory.
So I want to put a Brook's universal pcb in my Hori RAP 3. This one:
Could anyone point me in the direction of a guide to help me connect the wires properly? I have no idea where the wires for the little switches or the start/select and player 1234 LED wires go. This is my first pcb swap and I really don't want to screw this up. Any help would be greatly appreciated.
Edit: Also how do I mount the pcb in the case? The old one was shorter than the Brook's pcb so the screws don't line up.
I understand. Would switching the buttons out help or is it the case itself?
What is the best place to buy arcade buttons at?
Will just anywhere that sells Sanwa stuff like say Amazon?
What is the best place to buy arcade buttons at?
Will just anywhere that sells Sanwa stuff like say Amazon?
so, mad catz is now partnering its store with amazon. On one side it makes them look even more like they are dying, on the other, prime shipping?
might have to buy some bezels and side panels before they die.
I'm basically assuming that the LED board is never coming back, so now I'm trying to figure out plain white LED options for my buttons. Only one I see is KNsert, but I'm lazy and done want to solder that one...hrmmm
How does putting plexi glass over the fightstick work? I see it comes with screws. I don't see any holes on my stick that the screws can go into.
Usually gotta pop the buttons out and remove whatever art is on there in the first place. There should be screw holes underneath that hold the surface onto the base of the stick.
Then it's just putting artwork on, laying the plexi over that, and replacing the buttons (and ball top, don't have to remove the joystick completely), and screwing it all back down.
So basically where you don't see screws before you will now see screws.
so, mad catz is now partnering its store with amazon. On one side it makes them look even more like they are dying, on the other, prime shipping?
might have to buy some bezels and side panels before they die.
I'm basically assuming that the LED board is never coming back, so now I'm trying to figure out plain white LED options for my buttons. Only one I see is KNsert, but I'm lazy and done want to solder that one...hrmmm
shit...probably, i never thought to check there. Ive been waiting for them to come back in stock for monthsWait. Did they kill thr Canadian Store also? Those LED boards were available on there. I was considering getting a couple but the Canadian store seems to be gone.
So my fightstick (Madcatz Fightstick Pro) already has the plexi glass and screws on it?
Anyone? I'm still a bit confused about the whole plexi glass thing.
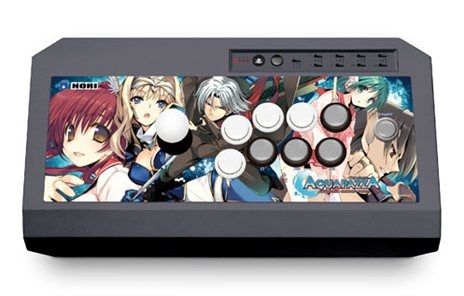
You mean a stick like this?
If so, then no. That stick does not have plexiglass and I believe the screws are under the stick art.
You will have to open up the stick from the bottom first, take out the buttons and then remove the sticker artwork to reveal the top screws.
Yes that is my stick. Do I have to buy plexi glass?
If you want to change the art with something that is non-laminated, then you will have to buy plexiglass.
You can buy some here: http://tek-innovations.com/arthobbies/?loc=products&cat=15&subcat=&item=164
Otherwise, you are fine with the default stick.
I hate being an announce by asking all these questions, but what do you mean by "non-laminated".
Also just how do I install the plexiglass if there are no screw holes?
I mean stick art without laminated paper covering it up. It just another way to cover stick art. I'm not an expert in using laminated paper or stick art for that matter. I just buy plexiglass for my stick from the site that I posted.
The holes are there. You have to remove the current stick-art off completely to see them.
This video might help you:
https://youtu.be/ZtPrVPXnqrI?t=782


