The Elder Scrolls V: Skyrim PC Performance discussion

Hey guys, an update for the new water should come out tonight to fix file size, foam glow, and hopefully the water speed. The speed of the water isn't a tweak that I messed with, it is just an unintentional side effect of having a completely new texture with new "waves." If anyone has any advice that would be great.

It would be nice if you can figure out the fast flowing issue. The actual textures are very nice looking! Do you have any plans on making other textures for landscapes and objects?
 
tesv2011-11-2017-42-2u6u8a.png


Downsized from 1080P, Transparency AA should remove the jaggies on the water right?
 
It would be nice if you can figure out the fast flowing issue. The actual textures are very nice looking! Do you have any plans on making other textures for landscapes and objects?
I most likely won't be able to fix the speed without drastically changing the texture at the moment. The faster effect is a result of the smaller waves and details in my texture. Uninstall my mod and you'll see that the water is moving at the same speed it always was. Until the CK is released we'll just have to live with it.

As for other mods, I attempted high res clouds but it was very complicated and I moved on to other things. I'm planning on updating fire, smoke, and possibly landscapes since no one has released one that stays true to bethesda's art direction yet.
 
I made a quick attempt to improve the shadows based on the info in the OP and it decimated my framerate. I'm guessing my 1 GB 5850 just doesn't have the chops. The shadows are a real bummer as they are.
 
I have the same specs as you (C2D is a 2.4ghz) and don't have as drastic a drop as you, it never drops below 25 in any areas.

My skyrim.ini and my skyrimprefs.ini. (these were made in conjuction with FXAA injector (my settings), so put the gamma back up if you're not using the it)
You can try lowering "iShadowMapResolution=512" for indoor areas to 256.

e: also add "iFPSClamp=30" (or 60) to the general section of skyrimprefs.ini

I downloaded fraps to confirm if my fps estimates were right nor not; outside and in areas without multiple lighting sources, I am getting 40-60fps. In the area I described in Fort Graymoor, I get as low as 15fps with all possible lights onscreen, and the average would be between 18-25fps.

I modified my Skyrim.ini with all the changes present in yours, but it I'm still getting the slowdown.

I changed the iShadowMapResolution to 256 and IFPSClamp to 30, but according to Fraps, my FPS is going past 30 in some areas so the FPS limiter is not working, and my game still lags.

I went through and changed my SkyrimPrefs.ini to exactly match the settings in yours and it dropped my fps in the same area to 13-18fps, so I set it back and I'm at 18-25fps average again.

Thanks for the suggestions MrBig :) - I can still play 90% of the time without issue, so I think I'll just deal with these infrequent drops in performance when they occur until newer drivers/patches improve the gaming performance.

Unless anybody has any further suggestions, of course.

Has anyone else discovered a fix for framerate issues in areas with multiple light sources?

As an example, as soon as I get inside the first indoor area in the opening scene, the framerate drops to 10-15fps and doesn't go above 20 until you get outside.

Once I get outside, the framerate is fine; just indoors with multiple light sources, and the framerate drops. As a further example, in Fort Graymoor, the dungeon has a room with multiple candles and chandeliers. As soon as I'm looking at them, my framerate takes a major hit.

Even when I set my settings to Low, the framerate isn't improved when looking at multiple light sources.

My hardware:

HP DV7T
Core 2 Duo T9400 @ 2.53ghz
Geforce 9600M GT 512MB
4GB DDR2 PC2-6400
Native resolution 1680x1050

According to the Bethesda hardware post, my notebook gpu should be able to run the game at Medium-Low.

I've set it to Medium, turned off AA, AF, FSAA and set the shadows to Low. I'm also running the game at 1280x800 (letterbox) and the framerate is very smooth except for the drop with multiple light sources. I'm running the Nvidia 285.79s and have applied the LAA fix to TESV.exe. I've also attempted to use the d3d9.dll fix here and ENB's modified dll as well.

I've also tried every config I could find in this thread and made a custom config using this site; even with all the low settings, there is no change.

I'd like to stress that 95% of the time, the framerate is 40-60 fps, but the few occasions this occurs, it makes it very difficult to hit anything accurately in combat.

Hopefully the new patch improves performance. Aside from this, I'm loving the game.
 
Anyone having texture issues with 11.11 drivers on the 6900 series? Having some annoying pop ins, not drawing stuff like paths in full detail until I'm standing right on top of it. Really distracting.
 
The following is for Archers.


Put that in your skyrim.ini file so the arrows fly out the reticle and not over it.

Download this mod if you are tired of sending enemies flying back 20 feet with one arrow.
http://www.skyrimnexus.com/downloads/file.php?id=601

This makes for far more realistic death animations.


Put that in your skyrim.ini just add it to the bottom. It eliminates the damage drop off with archery and magic at ultra long ranges. Now your ultra long range shots will impact .

Meh, I am not into things that change how the game is supposed to play.
 
The water mod makes the water look like jelly.

This is water:
http://4.bp.blogspot.com/_1p20WdeXKKs/TESwgj8jtdI/AAAAAAAAJbo/wFdIFHIwp7Q/s1600/Ocean1.jpg[/IM G]
The specular in the modded water is overdone.[/QUOTE]
This would make me spend hours swimming and admiring the sea. But I doubt it can happen.

I love mods. Better rain drops, better water, better sky and killable children are all installed.
 
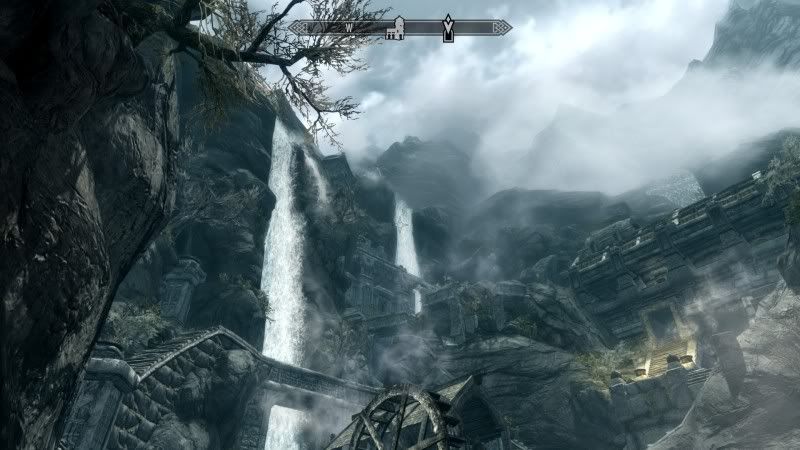
Does this view in Markarth kill your framerate? I got a GTX 580 and looking at this view as in the picture felt like the fps was in the low 20s; haven't measured it yet. It was worse than overlooking Whiterun from the Dragonreach steps.

2011-11-20_00002.jpg
 
I wonder if down the line we'll see something like Morroblivion. I'd love to see both Oblivion and Morrowind available to play through in skyrim.
 
I'm not sure what happened, but now for some reason while running Dxtory to cap the framerate, it isn't crashing during loading like it was before. A good sign, certainly, but bewildering. I feel so much better playing it this way than with constant fluctuations.
 
Is there a terminal command to clear out dragon skeletons? I've got 3 of these things at the college, 1 in the middle of Riften, and in other places. They seem to fuck up the game engine, or dragons in general. I've played through all major quest lines and I've crashed about 50 times. I think every time has been during a dragon attack or just after leaving an area where a dragon attacked. Half of the time textures are missing and things have a light blue shade to them. When I see the blue texture I know it's time to restart to mitigate a crash.

When I fast travel to places with dragon skeletons they'll be 10+ feet in the air and land somewhere close to where they were originally.

Maybe the texture load has to do with stressing the engine...? I usually play with player.setav speedmult to 150 in caves/dungeons, 250 outdoors.
 
yeah going into most major cities kills it, markarth is the worst though.
but the view from dragonsreach is pretty bad too, just gotta wait for a fix
 
Perhaps we should keep a list of actually useful/good mods, considering the flood of crap being released this early.

Here's what I have installed - all available on Skyrim Nexus:
- Vurts Skyrim Flora Overhaul (*real* texture improvement for plants, comparison)
- Realistic Water Textures (from our very own isoku)
- Improved Female Skin Textures (mostly because I don't see why Bretons need to have wrinkles regardless of age :P)

Please add anything you use and can confirm to be working and useful, with a short description if it's not obvious.

Great idea and very useful.
 
Question:

Under MyDocuments/My Games/Skyrim the skyrimprefs.ini is different than the one in the steam folder....shouldn't they be the same. The one in mydocs is longer and has the sd3ddevice field that liquid was mentioning a few pages back, the one located in the steam folder does not. When you make changes, which directory do you apply them to?
 
Perhaps we should keep a list of actually useful/good mods, considering the flood of crap being released this early.

Here's what I have installed - all available on Skyrim Nexus:
- Vurts Skyrim Flora Overhaul (*real* texture improvement for plants, comparison)
- Realistic Water Textures (from our very own isoku)
- Improved Female Skin Textures (mostly because I don't see why Bretons need to have wrinkles regardless of age :P)

Please add anything you use and can confirm to be working and useful, with a short description if it's not obvious.
As Dennis said, good idea.

Here are some links:

Flora Overhaul - Improved trees
Realistic Water Textures
Improved Female Skin Textures
 
How do you save the FOV? I put these settings under the SkyrimPrefs but it doesn't seem to do anything

[Display]
fDefault1stPersonFOV=80.0000
fDefaultWorldFOV=80.0000
 
FXAA Injector Guide

Edit: You can alt-tab out, change values, ctrl-s the config file, alt-tab in to the game to see the changes, you don't have to quit the game.

Mod download link: http://www.skyrimnexus.com/downloads/file.php?id=131

Follow the instructions from the mod page to install correctly!

The colour and sharpening settings are tweaked purely based on personal preferences.
This mod doesn't reduce fps significantly as it is only changing the colours. (at best 1-5fps using FXAA/ Higher precision sharpening)

The demonstrated values are my settings and you are free to use them if you wish to.
Most of the instructions are already embedded in the config file, so i'll post more comparison pics rather than explain what each function does.
// Comment to deactivate an effect.
// Example: To disable the tonemap effect, use // in front of #define USE_TONEMAP

// Use this to break your text from the main code. Any text after these will not make any changes to the config.

Red parts in the code tags are not part of the actual code.

Don't deactivate:
#define USE_ANTI_ALIASING - Will make your screen black

Don't activate:
//#define USE_FINAL_LIMITER - Will make your screen black


Part A: Anti-Aliasing/FXAA and Pre-Sharpening

FXAA and Sharpen comparison picture with these settings:

Code:
/*------------------------------------------------------------------------------
						FXAA SHADER
------------------------------------------------------------------------------*/
// Set values to calculate the amount of Anti Aliasing applied
float fxaaQualitySubpix = 0.5;  // Default: 0.75 Raise to increase amount of blur
float fxaaQualityEdgeThreshold = -1; // Lower the value for more smoothing
float fxaaQualityEdgeThresholdMin = -1; // Lower the value for more smoothing


/*------------------------------------------------------------------------------
						PRE_SHARPEN
------------------------------------------------------------------------------*/
//For higher precision in the calculation of contour, requires slightly more processing power
bool highQualitySharpen = 1; //0 = Disable  | 1 = Enable

// Set values to calculate the amount of  AA produced blur to consider for the sharpening pass
#define Average 0.8
#define CoefBlur 2

// Set values of the sharpening amount
#define SharpenEdge 0.2
#define Sharpen_val0 1.2

iTM8mHOK3kAol.jpg


Part B: Bloom

I don't use bloom in my config but I'll post comparison pics with the settings below and vanilla.

Code:
/*------------------------------------------------------------------------------
						BLOOM
------------------------------------------------------------------------------*/
// Number of samples per pixel taken for the Bloom effect. Don't set it to high!  4 = 25spp, 8 = 81spp, 16 = 289spp
#define NUM_SAMPLES2 4 // Must be set with a value dividable by 2
float BloomPreset = 9; // Disabled = 0 (Valid Preset Values = 1 to 9) Preset value 1 to 9 takes control over the next 3 settings.
float BloomThreshold = 9; // The min. level at which the effect starts (Valid Values = 1 to 9, use decimals for finetuning)
float BloomWidth = 9; // Sets the width of the effect (Valid Values = 1 to 9, use decimals for finetuning)
float BloomPower = 9; // The power of the effect (Valid Values = 1 to 9, use decimals for finetuning)

As you can see in the comparison picture, even with max bloom levels, it's nothing overdone like in some games.

iG2i74rEGwkWH.jpg


Part C: Technicolor and Tonemap

This feature is used to make selective colours pop out further. This feature combined with Tonemapping will be used to change your overall colour output.
Without Tonemapping enabled, this won't make much of a difference.


Code:
/*------------------------------------------------------------------------------
						TECHNICOLOR
------------------------------------------------------------------------------*/
#define TechniAmount 0.20 // 1.00 = Max
#define TechniPower 4.0 // lower values = whitening

// lower values = stronger channel
#define redNegativeAmount 0.86 // 1.00 = Max
#define greenNegativeAmount 0.95 // 1.00 = Max
#define blueNegativeAmount 0.98 // 1.00 = Max

As you can see the oranges 'pop out' better.

ijyYlegbQYVAK.jpg


Code:
/*------------------------------------------------------------------------------
						TONEMAP
------------------------------------------------------------------------------*/
#define Gamma 1.00 Lower values will make your image brighter
#define Exposure 0.0 Higher values will also make the image more contrasted, these two values can make the game look brighter/darker or more contrasted. Be careful as it might introduce black crush
#define Saturation 0.80 // use negative values for less saturation. 
#define BlueShift 0.00 // Higher = more blue in image.
#define Bleach 0.00 // Bleach bypass, higher = stronger effect
#define Defog 0.070 // Strength of Lens Colors.
#define FogColor float4(0.25, 0.43, 0.15, 0.00) //Lens-style color filters for Blue, Red, Yellow, White.

itEMMZqEkyeeB.jpg


Part D: Sepia

Code:
I don't use this filter and you shouldn't either unless you like monochromatic piss filters.
/*------------------------------------------------------------------------------
						SEPIA
------------------------------------------------------------------------------*/
#define Earthyellow // Color Tone, available tones can be seen in ColorTones.PNG (Do not use spaces in the name!)
#define SepiaPower 0.2 // 1.00 = Max

ibf9dbFxS5s0Cl.jpg


I'm going to turn off the sepia filter now for the next images because it's extremely bad looking...

Part E: Vignette

This setting puts darker edges onto the screen so the action is more focused within the middle of the screen. I personally don't like the effect so I don't use it.

Code:
/*------------------------------------------------------------------------------
						VIGNETTE
------------------------------------------------------------------------------*/
// Vignette effect, process by which there is loss in clarity towards the corners and sides of the image, like a picture frame
#define VignetteCenter float2(0.500, 0.500) // Center of screen for effect.
#define VignetteRadius 1.00 // lower values = stronger radial effect from center
#define VignetteAmount -1.00 // Strength of black. -2.00 = Max Black, 1.00 = Max White.

ivWjTRDFpcFN3.jpg


Part F: Post Sharpen

This can be used in conjunction with Pre Sharpen filter.
I personally don't like how this looks on top of Pre Sharpen filter. It creates jpeg compression like artifacts.

Code:
/*------------------------------------------------------------------------------
						POST_SHARPEN
------------------------------------------------------------------------------*/
// Controls additional sharpening applied after previous processing. Strength should be max 0.25!
float Sharpen = 0.05;

it17ibSKCbHbO.jpg


Part G: The final control

This should control the final image outcome but enabling this will make your game invisible.

Code:
/*------------------------------------------------------------------------------
						FINAL_LIMITER
------------------------------------------------------------------------------*/
// Controls the strenght of the limiter. 1.000 for default setting
int LimiterStrenght = 1.000;

My version:

I've tweaked my colours so they are warmer and lusher. Sort of like Witcher 2's colour palette while still keeping that cold Skyrim feel.

Vanilla:


Tweaked:


And some more shots:


Code:
/*======================================================================================
                             "USER" ADJUSTABLE SETTINGS
======================================================================================*/

// TODO: Normalize values to be on a human range scale, whole numbers prefered, decimals usable for micro adjustments
// These values should have min/max limit checks included in their functions, so that the end user doesn't get crazy results

/*------------------------------------------------------------------------------
						FILTER SELECTION
------------------------------------------------------------------------------*/
// Comment to deactivate an effect. 
// Example: To disable the tonemap effect, use // in front of #define USE_TONEMAP
#define USE_ANTI_ALIASING
#define USE_PRE_SHARPEN
//#define USE_BLOOM
#define USE_TECHNICOLOR
#define USE_TONEMAP
//#define USE_SEPIA
//#define USE_VIGNETTE
//#define USE_POST_SHARPEN
//#define USE_FINAL_LIMITER


/*------------------------------------------------------------------------------
						FXAA SHADER
------------------------------------------------------------------------------*/
// Set values to calculate the amount of Anti Aliasing applied
float fxaaQualitySubpix = 0.0;  // Default: 0.75 Raise to increase amount of blur
float fxaaQualityEdgeThreshold = 0; // Lower the value for more smoothing
float fxaaQualityEdgeThresholdMin = 0; // Lower the value for more smoothing


/*------------------------------------------------------------------------------
						PRE_SHARPEN
------------------------------------------------------------------------------*/
//For higher precision in the calculation of contour, requires slightly more processing power
bool highQualitySharpen = 1; //0 = Disable  | 1 = Enable

// Set values to calculate the amount of  AA produced blur to consider for the sharpening pass
#define Average 0.8
#define CoefBlur 2

// Set values of the sharpening amount
#define SharpenEdge 0.2
#define Sharpen_val0 1.2


/*------------------------------------------------------------------------------
						BLOOM
------------------------------------------------------------------------------*/
// Number of samples per pixel taken for the Bloom effect. Don't set it to high!  4 = 25spp, 8 = 81spp, 16 = 289spp
#define NUM_SAMPLES2 4 // Must be set with a value dividable by 2
float BloomPreset = 5; // Disabled = 0 (Valid Preset Values = 1 to 9) Preset value 1 to 9 takes control over the next 3 settings.
float BloomThreshold = 1; // The min. level at which the effect starts (Valid Values = 1 to 9, use decimals for finetuning)
float BloomWidth = 1; // Sets the width of the effect (Valid Values = 1 to 9, use decimals for finetuning)
float BloomPower = 1; // The power of the effect (Valid Values = 1 to 9, use decimals for finetuning)


/*------------------------------------------------------------------------------
						TECHNICOLOR
------------------------------------------------------------------------------*/
#define TechniAmount 0.20 // 1.00 = Max
#define TechniPower 4.0 // lower values = whitening

// lower values = stronger channel
#define redNegativeAmount 0.86 // 1.00 = Max
#define greenNegativeAmount 0.95 // 1.00 = Max
#define blueNegativeAmount 0.98 // 1.00 = Max


/*------------------------------------------------------------------------------
						TONEMAP
------------------------------------------------------------------------------*/
#define Gamma 1.00
#define Exposure 0.0
#define Saturation 0.80 // use negative values for less saturation. 
#define BlueShift 0.00 // Higher = more blue in image.
#define Bleach 0.00 // Bleach bypass, higher = stronger effect
#define Defog 0.070 // Strength of Lens Colors.
#define FogColor float4(0.25, 0.43, 0.15, 0.00) //Lens-style color filters for Blue, Red, Yellow, White.


/*------------------------------------------------------------------------------
						SEPIA
------------------------------------------------------------------------------*/
#define Earthyellow // Color Tone, available tones can be seen in ColorTones.PNG (Do not use spaces in the name!)
#define SepiaPower 0.5 // 1.00 = Max


/*------------------------------------------------------------------------------
						VIGNETTE
------------------------------------------------------------------------------*/
// Vignette effect, process by which there is loss in clarity towards the corners and sides of the image, like a picture frame
#define VignetteCenter float2(0.500, 0.500) // Center of screen for effect.
#define VignetteRadius 1.00 // lower values = stronger radial effect from center
#define VignetteAmount -0.70 // Strength of black. -2.00 = Max Black, 1.00 = Max White.


/*------------------------------------------------------------------------------
						POST_SHARPEN
------------------------------------------------------------------------------*/
// Controls additional sharpening applied after previous processing. Strength should be max 0.25!
float Sharpen = 0.05;


/*------------------------------------------------------------------------------
						FINAL_LIMITER
------------------------------------------------------------------------------*/
// Controls the strenght of the limiter. 1.000 for default setting
int LimiterStrenght = 1.000;
 
Perhaps we should keep a list of actually useful/good mods, considering the flood of crap being released this early.

Here's what I have installed - all available on Skyrim Nexus:
- Vurts Skyrim Flora Overhaul (*real* texture improvement for plants, comparison)
- Realistic Water Textures (from our very own isoku)
- Improved Female Skin Textures (mostly because I don't see why Bretons need to have wrinkles regardless of age :P)

Please add anything you use and can confirm to be working and useful, with a short description if it's not obvious.

This is actually a really good idea, maybe something to keep in the OP? And preferably with a link to each mod :)
 
Thanks for all that info Kyaw, I was just trying out the FXAA injector today and whilst some of the pre-set configs were nice, they need some tweaking.
 
Perhaps we should keep a list of actually useful/good mods, considering the flood of crap being released this early.

Here's what I have installed - all available on Skyrim Nexus:
- Vurts Skyrim Flora Overhaul (*real* texture improvement for plants, comparison)
- Realistic Water Textures (from our very own isoku)
- Improved Female Skin Textures (mostly because I don't see why Bretons need to have wrinkles regardless of age :P)

Please add anything you use and can confirm to be working and useful, with a short description if it's not obvious.

Enhanced Night Sky is really good.
 
Kyaw, are you using the 1.2 or 1.3 version of the Mod ?

Apparently 1.3 disables FXAA.

Amazing post btw !

I'm probably using the 1.2 version. You need FXAA to counter the pre-sharpen's effects around the edges of objects.

Thanks for all the kind words, guys. :)
Try it out and post results!
 
Question:

Under MyDocuments/My Games/Skyrim the skyrimprefs.ini is different than the one in the steam folder....shouldn't they be the same. The one in mydocs is longer and has the sd3ddevice field that liquid was mentioning a few pages back, the one located in the steam folder does not. When you make changes, which directory do you apply them to?

My understanding is that you can forget about the .ini in the Steam folder.
 
This looks pretty good, as you can still see the sky unlike the other shots.

How big is the performance hit for doing this?

Edit: Nvm, missed this line:
The colour and sharpening settings are tweaked purely based on personal preferences.
This mod doesn't reduce fps significantly as it is only changing the colours. (at best 1-5fps using FXAA/ Higher precision sharpening)
 
I'm probably using the 1.2 version. You need FXAA to counter the pre-sharpen's effects around the edges of objects.

Thanks for all the kind words, guys. :)
Try it out and post results!

Ah great, I'll uninstall 1.3 then. :)

From your settings, you seem to have disabled everything but Anti-Aliasing. How come the colors are still affected ? (i.e.: all the defines are disabled, but USE_ANTI_ALIASING).

I find it weird that you still get some color post-processing.
 
Anyone having texture issues with 11.11 drivers on the 6900 series? Having some annoying pop ins, not drawing stuff like paths in full detail until I'm standing right on top of it. Really distracting.

Ok I fixed this issue by going into CCC (or radeonpro) and changing adaptive AA to super-sampling. Hope this helps someone out there with a similar issue.
 
This looks pretty good, as you can still see the sky unlike the other shots.

How big is the performance hit for doing this?

No performance hit! (or not noticeable, 1-5 fps)

Ah great, I'll uninstall 1.3 then. :)

From your settings, you seem to have disabled everything but Anti-Aliasing. How come the colors are still affected ? (i.e.: all the defines are disabled, but USE_ANTI_ALIASING).

I find it weird that you still get some color post-processing.

Sorry! Copy pasting fail there. :P

I've got on:

FXAA
Pre-Sharpen
Technicolor
Tonemap
 
I dunno how anyone can use the sharpen aspect of this mod. It looks cool in screens, but in motion there is a major problem. At a certain movement speed (quite slow), I can make it appear to 'lag' behind the moving texture that it's trying to enhance, which leads to a kind of flickering or ghosting effect at a certain 'frequency'. It's hard to explain. If I just run about as normal, textures are moving so fast that I don't notice it, but I like moving and rotating the camera really slowly at times, and that's when this issue crops up. I imagine the point at which this occurs will vary depending on your display's response time, lcd pixel response that is, as well as framerate. But without fail, I can make this sharpness mod flicker at a certain speed of moving texture (most noticeable on the ground and to the sides of the screen, where textures are closest and moving quickest). It's very distracting.

Doesn't anyone else see this?
 
Not really Skyrim related but since RadeonPro was mentioned in this thread, is there a way to OC your GPU or change the fan settings? That's the only thing holding me back from dropping CCC completely.
 
My understanding is that you can forget about the .ini in the Steam folder.

Ok cool.

I went ahead and made some .ini. changes based off of the 580SLI settings in the OP. Using 4x MSAA and 4x SSAA. Based off that config and my Nvidia Inspector settings VRAM on my 2 cards hit 2.9GB, the highest I've ever seen on my 3GB 580s :O. FPS still stayed above 60fps with ease. Looks so good.
 
Top Bottom