I'll wish you luck! I'm very interested to hear how you get on with this and would appreciate a few pictures and words around the process if you can do that. I've often considered doing this on other projects but applying it to irregular shapes has put me off tbh.
Okay I finished up. I went ahead and did the top plate with that stuff even though I don't have a replacement balltop or buttons for the new build. The stuff works pretty decently. It had a paper backing to it with graph paper on it. Felt like the same thick laminate top label stickers I've used before but when you heat it the stuff gets super thin and rubbery and tends to curl. Not hard to work with though...due to this you only need a second with the heat gun to get it ready to make a strong bond. Just heat, and rub on it and it'll grip like mad.
Had to take the guts out entirely though. You need the stick, turbo, and button holes empty then you just top sheet the whole thing. After that I used an x-acto knife from my scalpel kit to easily puncture the vinyl over the holes and peel it back. Once peeled I just pressed it up on the inside of the label. Lesson learned though...I should have just left the top plate screwed on the case once the electronics were out because I had to cut screw holes in the finished plate to reattach it. Had I laid a sheet of this over it, and heated/pressed it on from there with the case still screwed on it wouldn't have those. Since I needed to scalpel trim anyhow I could have just taken a poker card to press the vinyl into seams once heated then trimmed with the scalpel that way to avoid having screws showing.
Stuff worked great and was easy. You need that scalpel kit though because at the end any millimeters of extra around the seems needs traced with the scalpel and gently filleted out for a clean fit. Only problem I have though are that I had used a rubber cement to help force my old label to stay to the stick because it kept coming off before. Due to this my stick wasn't smooth and polished and had small areas of glue...those areas are NOT smooth on my stick currently
. This PVC Vinyl chrome picks up any imperfection. Due to this you need to have your top plate COMPLETELY SMOOTH. Also I bought mine and it was not a good quality chrome. Its not as mirror polished as I've seen. Very shiny and neat, but not mirror shine so by quality. Its cheap where ever you get it though, but don't ebay from some unknown in China as I did if you want a mirror shine I guess.
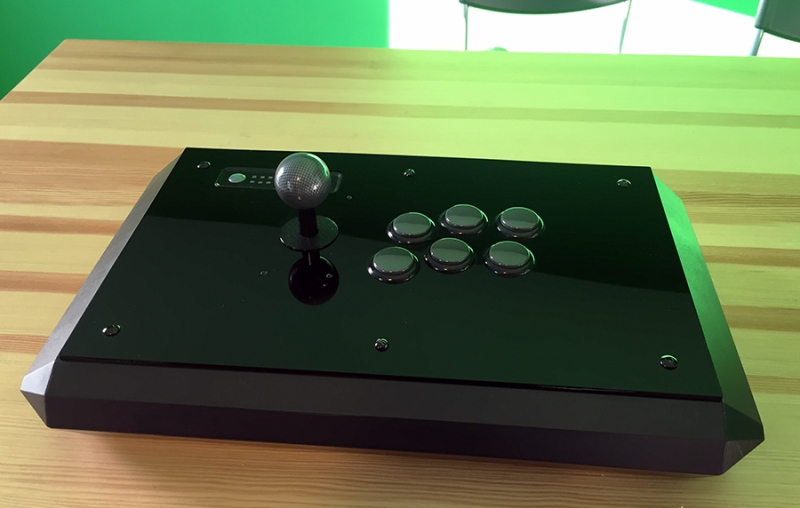
Here's the result. Not bad for a trial run. Needs more work for sure on buttons and balltop and I'll likely remove this one and sand my top plate smooth and go for a second run later. However, I'd say it works nice and easy to use this stuff, but it'll take a bit better quality gear to finish this stick. I'm gonna look around to car customization sites next for more of this stuff in a higher quality.
Sad thing is that there is no way to press this over the case without a seam. It stretches and seals fine, but if I tried to just press a flat sheet over the sides from the top I'd invariably end up with wrinkles over the tops where the sides are. Due to this I'll likely paint the case itself for a custom trim next time I do this. Probably sand it and use car paints or a nice brass or something. Problem with metal paints is that the chromium used for the shine is top coat resilient. Gonna have to look around on that one.
I'm considering finding a
Kaimana LED PCB for this stick for when I get buttons and goin LED with it. The chrome and light show would be neat.