-
Hey Guest. Check out your NeoGAF Wrapped 2025 results here!
You are using an out of date browser. It may not display this or other websites correctly.
You should upgrade or use an alternative browser.
You should upgrade or use an alternative browser.
NeoGAF Arcade Stick Thread
- Thread starter MarkMan
- Start date
- Status
- Not open for further replies.
Going towards you and anyone else who has had hands on, is there a huge difference between the HORI sticks and the lower tier SFIV stick?MarkMan said:Best Hori Bootleg stick ever.
I'm not crazy into the swapping buttons and such. The Anniversary Stick has been my favorite so far to be honest, but I'm looking to try a new one.
DoDonGouki
Member
And another HRAP SF4 yesterday from UPS

Valkyr Junkie
Member
Captain N said:Are there any sticks that work on the PS3 & 360?
Don't believe so since 360 uses XID and PS3 uses HID. The best solution is to get a 360 stick and then add a Cthulhu PCB for PC/PS3 support.
MarkMan said:Best Hori Bootleg stick ever.
Yeah, it's nice to finally be able to replace my old, clunky stick with a new one. Especially with one that has KUNGFU.

buffi said:Yeah, it's nice to finally be able to replace my old, clunky stick with a new one. Especially with one that has KUNGFU.
F'ing hilarious.

KolosLazar16
Member
Got my fightpad today, AZ Greg is gona help with a TE Stick if capcom and amazon both go through, so I'm praying. =/ For those with the fightpad, play with more than 1 finger or just thumb?
Valkyr Junkie said:Don't believe so since 360 uses XID and PS3 uses HID. The best solution is to get a 360 stick and then add a Cthulhu PCB for PC/PS3 support.
360 sticks already work on the PC.
gkrykewy said:God dammit, Amazon. Go to "shipping soon" on my TE already. GAH!
You think you have it bad? We Europeans don't get the stick until the 25th, 5 days after the game

andymcc said:I just called my local one and they're showing the TE and SE in transit in their incoming shipments, but as they have yet to receive shipment for today they didn't know if it was for today or tomorrow.
Just got a call from my pal over at the local Gamestop I pre-ordered from. He says the shipment just left the warehouse and it was going to be arriving most likely this Friday. Yayy!
NameGenerated
Who paid you to grab Dr. Pavel?
Well that's what Amazon says. So we're of equal suckage.Ledsen said:You think you have it bad? We Europeans don't get the stick until the 25th, 5 days after the game
I've got a MAS stick here, PS2, and am hoping to get SF4 on 360. I tried converting it to 360 using this: http://www.xcm.cc/xcm_xfps_360.htm but its got some lag. Is there something like the cthulhu I could get, but for 360?
If not, I'll just go pick up a Fightstick today. Those are readily available, right?
If not, I'll just go pick up a Fightstick today. Those are readily available, right?
DKo5 said:I've got a MAS stick here, PS2, and am hoping to get SF4 on 360. I tried converting it to 360 using this: http://www.xcm.cc/xcm_xfps_360.htm but its got some lag. Is there something like the cthulhu I could get, but for 360?
If not, I'll just go pick up a Fightstick today. Those are readily available, right?
I'm pretty sure the only way to get a 360 board is to buy a cheap controller (like MadCatz little "arcade stick" or whatever it's called) and put that in your stick. There's no easy Cthulhu-like solution. That's why most people who want 360/PS3 sticks buy one for 360 and put a Cthulhu in it.
D
Deleted member 20415
Unconfirmed Member
I just got a call from "Ashley" that my stick should be in this afternoon... AWESOME!
El_TigroX said:I just got a call from "Ashley" that my stick should be in this afternoon... AWESOME!
good luck with that, my local store STILL doesn't have them in stock, states it'll be tomorrow.
bob_arctor
Tough_Smooth
El_TigroX said:I just got a call from "Ashley" that my stick should be in this afternoon... AWESOME!
Yup, me too. I'm about to call the store to confirm. Now, if they actually do have it, the only real problem is sneaking in the rather large box so that my wife doesn't see it. Somehow. Hmm. What manner of lies will Street Fighter force me to promulgate now??
Street Fighter: Just like having an affair. But with more buttons.
Giant Robot
Member
I'm kinda pissed at my local Gamestop right now.
As soon as the TE stick was announced, i went down to GS and put $50 deposit on the stick. I was VERY insistent that it was to be the TE stick and not the Fight Stick. Went back a couple weeks ago to pay it off and they say i only owed $15. WTF. They put me down for the WRONG stick and never got any other pre-orders for the TE stick. Of course by now they already closed off their pre-orders.
but it got me thinking....maybe the GS employee is lying to me so he can take my pre-order.
Can anyone tell me the GS sku# of the TE stick? I wanna make sure my sku# matches with another TE stick.
FlashFlooder
Member
Giant Robot said:I'm kinda pissed at my local Gamestop right now.
As soon as the TE stick was announced, i went down to GS and put $50 deposit on the stick. I was VERY insistent that it was to be the TE stick and not the Fight Stick. Went back a couple weeks ago to pay it off and they say i only owed $15. WTF. They put me down for the WRONG stick and never got any other pre-orders for the TE stick. Of course by now they already closed off their pre-orders.
but it got me thinking....maybe the GS employee is lying to me so he can take my pre-order.
Can anyone tell me the GS sku# of the TE stick? I wanna make sure my sku# matches with another TE stick.
You should go back there and knock down the magazine rack
Giant Robot said:I'm kinda pissed at my local Gamestop right now.
As soon as the TE stick was announced, i went down to GS and put $50 deposit on the stick. I was VERY insistent that it was to be the TE stick and not the Fight Stick. Went back a couple weeks ago to pay it off and they say i only owed $15. WTF. They put me down for the WRONG stick and never got any other pre-orders for the TE stick. Of course by now they already closed off their pre-orders.
but it got me thinking....maybe the GS employee is lying to me so he can take my pre-order.
Can anyone tell me the GS sku# of the TE stick? I wanna make sure my sku# matches with another TE stick.
I just got the automated message telling me my TE stick came in. I'll check out the SKU and let you know.
diffusionx
Gold Member
So if GameStop already got them and are giving up the goods, why is Amazon still saying the 25th+?
FlashFlooder
Member
diffusionx said:So if GameStop already got them and are giving up the goods, why is Amazon still saying the 25th+?
Good question, I would also love to know the answer. Someone call them? i can't, I'm at work.
Valkyr Junkie
Member
Has Capcom already shipped the TE stick orders they were able to fill?
")
PhatSaqs said:Anyone swapped out the square gate for an octagonal on the TE yet? If so instructions please thanks.
Watch the first 2 mins of this:
http://www.youtube.com/watch?v=WMIxXgL0eNU
Watch the first 20 seconds of this:
http://www.youtube.com/watch?v=QytcbzZmXaI
Quick question: Would the "Sanwa GT-0 Round Restrictor Plate" on this page...
http://www.lizardlickamusements.com/pages/joysticks.shtml
...work in the standard edition (non-TE) FightStick?
http://www.lizardlickamusements.com/pages/joysticks.shtml
...work in the standard edition (non-TE) FightStick?
kenta said:Quick question: Would the "Sanwa GT-0 Round Restrictor Plate" on this page...
http://www.lizardlickamusements.com/pages/joysticks.shtml
...work in the standard edition (non-TE) FightStick?
no
Thank you, though I suppose I should have asked for more information. Is the stick in the standard edition FightStick a JLF or JLW? Should I be looking at the "Sanwa GT-Y Octagonal Restrictor Plate" instead?Halvie said:
kenta said:Thank you, though I suppose I should have asked for more information. Is the stick in the standard edition FightStick a JLF or JLW? Should I be looking at the "Sanwa GT-Y Octagonal Restrictor Plate" instead?
The standard doesn't have a Sanwa stick. You need to buy a Sanwa stick and replace the stock stick. Then you can use the Sanwa gate you posted.
Giant Robot
Member
drmcclin said:You should go back there and knock down the magazine rack
:lol
was gonna expect that as a first response
Okay... so if it can't fit either JLW or JLF parts, what should I be looking for instead?Baron said:The standard has no JLF
Edit: Ah, much more helpful stealth edit, though again I'm not sure if I should be looking for anything in particular when looking for a replacement Sanwa stick. I guess I'll go looking and see if I can narrow down my questions before I ask them
Edit 2: Is the existing stick a Seimitsu?
Also note that the round gate you posted Kenta is for the JLW series, not JLF. Someone posted a few pages back that they were able to get a Sanwa octagonal gate (JLF compatible) onto the SE stick with a bit of effort (had to break the existing gate off completely), but I doubt anyone has tried to put a JLW gate on there, they just aren't as popular.
I wish =P
Edit 2: Is the existing stick a Seimitsu?
I wish =P
kenta said:Thank you, though I suppose I should have asked for more information. Is the stick in the standard edition FightStick a JLF or JLW? Should I be looking at the "Sanwa GT-Y Octagonal Restrictor Plate" instead?
I think the regular fightstick will work with a GT-Y, but I am not positive. Try doing a post search for "GT-Y".
DoubleTap said:So which Sanwa stick will fit on the SE, the JLF or JLW? I'm thinking JLF because of the 5 pin connector?
thanks.
That's right. You could put in a JLW if you really wanted, but hardly anyone uses them, and you'd have to do some soldering.
LiK said:crap, SFIV TE Stick came today but i wasn't home to sign for it from UPS
tomorrow is the day! FYI, the stick is from Gamestop
This is exactly what happened to me today.
Man, I told myself I wouldn't be one of the guys crowding these threads with stick fear and vague questions based on minimal information, but...
Preordered 360 TE stick from Best Buy.. they put the initial hold on my card, took the 160~ out.. eventually it cleared and the balance came back.. but now the 160 is gone again. Order Status is still Preorder: Ships on 02/15/09.. but I'm still cautiously psyched. Just hope that it ships a little bit earlier.. I'm not familiar with Best Buy's shipping but I doubt it'll get here before I get my hands on SFIV.
You know, I'm not sure this requires any response, or contains any questions. I think I just wanted to speak at someone. [/blog]
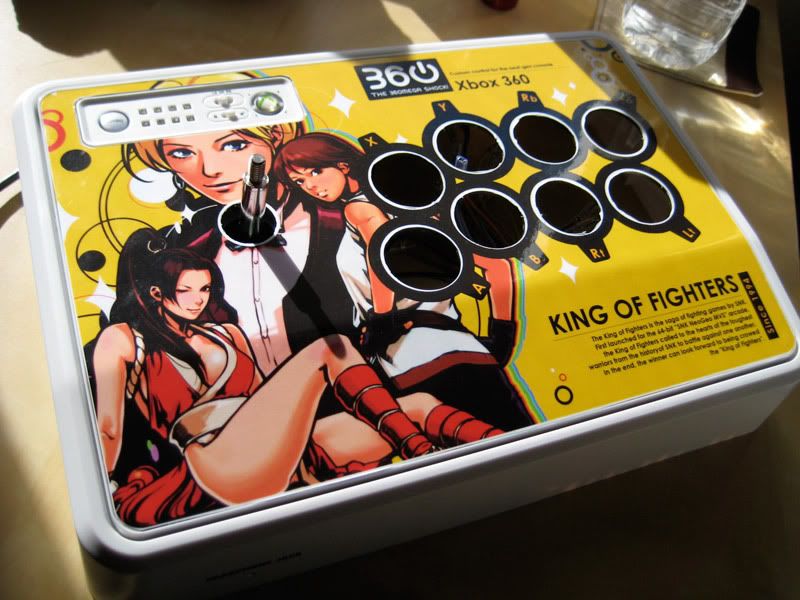
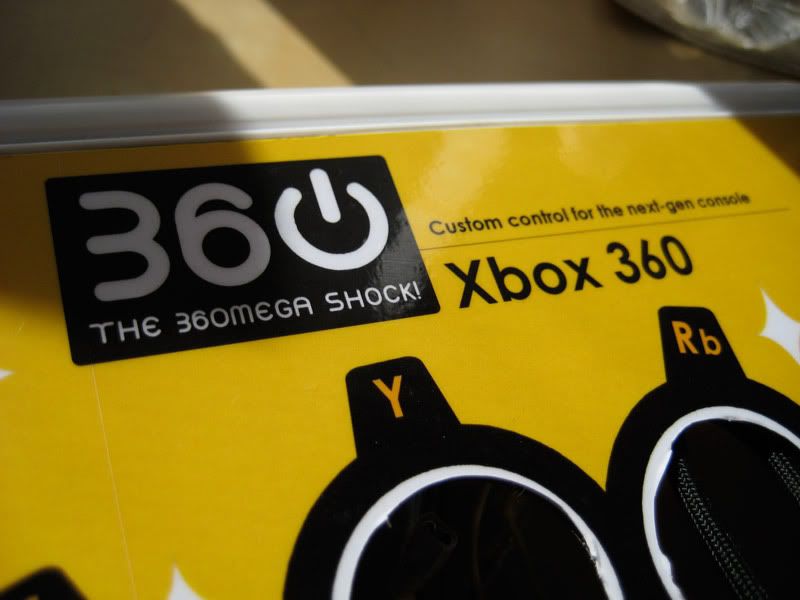
My Adventures in Modding the SE FightStick: Attempt #2
First attempt isn't even worth talking about, so we'll pass on that.
So the solution I ended up going with was a product called "lamilabel" from Kinko's. My initial idea was this: print the image on a full-sheet label, run in through the laminater (ending up with basically a laminated sticker), and go with that. Today, the person who helped me suggested these lamilabels, which are more of a pocket lamination-type product, but one that is made one side that peels off to be sticky. The reason I'm not so hot on pocket lamination is that typically it doesn't adhear as well to a sheet of paper, which is a shame because it is usually a heavier and more durable type of lamination.
However, this lamilabel stuff came out way better than I imaged, and doing the print as a standard color print versus printing in color to a full-sheet label, where the overall quality level drops a bit.
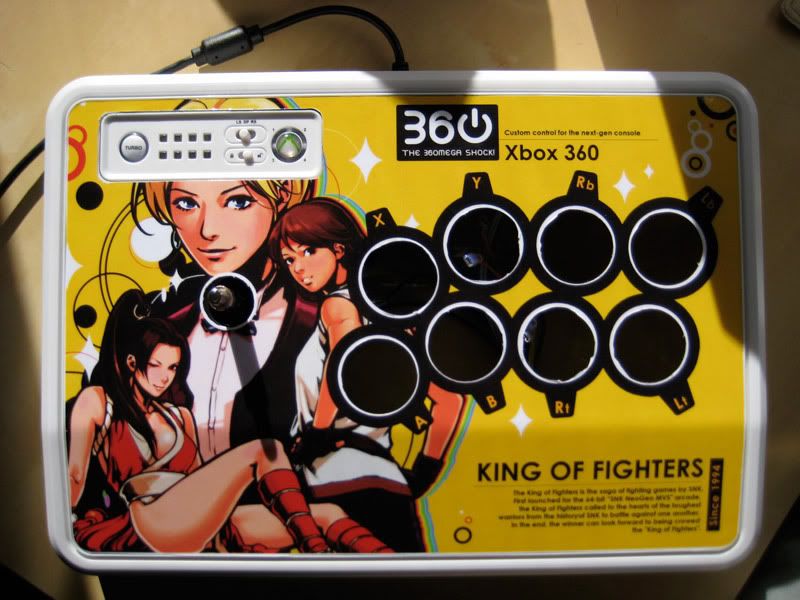
You can see the results below.
If you want to take this route, here is what I've learned below. I don't know the longevity of this lamilabel stuff, but it seems like it might be a decent solution. I put it straight onto the main stick artwork without taking it off, which I think will be a better idea then trying to take off the stock art. The stock art allows for peeling over the lamilabel if you want to, so that way you could easily swap out to a different image at a later date.
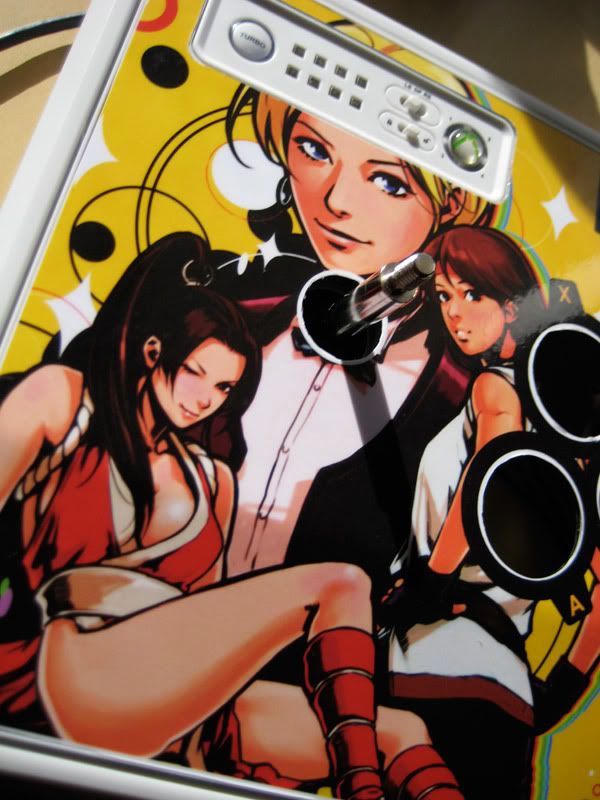
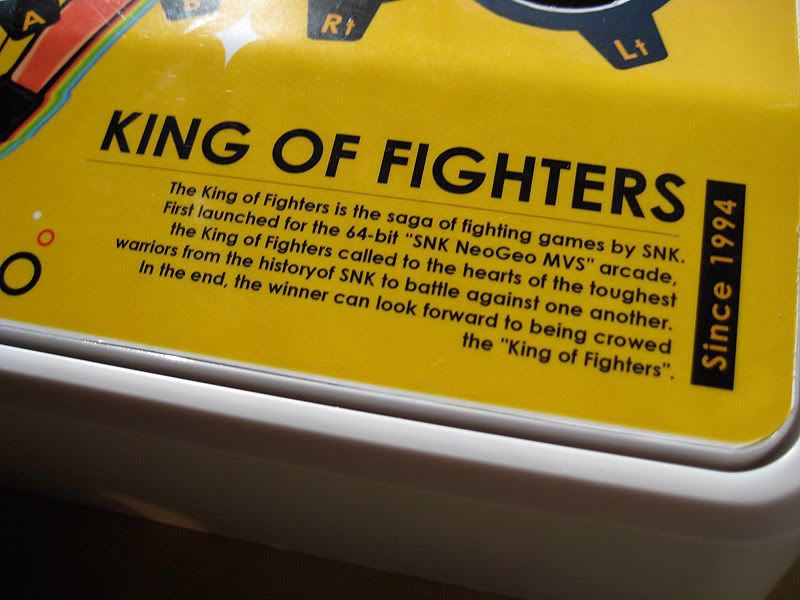
* Don't use the template as it current stands in regards to edges. Cutting to the set edges and then trying to get it to perfectly line up on the face is a real bitch. (As you can see in my photos below.) What I'm going to do is extend the edges a bit, cut to that size, stick the sticker on, and then do trimming there. Since the joystick's body by nature has a bit of a groove / edge around the face artwork, this worked well for the bit of trimming that I did do. So I think that for both the outer edge and around the controls, I'm going to try again, have it be a bit bigger than it should be, then trim afterwards for better results.
* Take off the white circles for where the buttons go. Keep the artwork full there, stick this on to the case, and then trim the button holes from the inside out. That way, your cuts will be perfect, it'll be far easier to cut out, and you know for certain that you'll have no white area on the artwork under your buttons.
Anyhow, as I said, I'm going to try another attempt at printing and putting on the artwork. Then I'll just need to order new buttons and a stick.
First attempt isn't even worth talking about, so we'll pass on that.
So the solution I ended up going with was a product called "lamilabel" from Kinko's. My initial idea was this: print the image on a full-sheet label, run in through the laminater (ending up with basically a laminated sticker), and go with that. Today, the person who helped me suggested these lamilabels, which are more of a pocket lamination-type product, but one that is made one side that peels off to be sticky. The reason I'm not so hot on pocket lamination is that typically it doesn't adhear as well to a sheet of paper, which is a shame because it is usually a heavier and more durable type of lamination.
However, this lamilabel stuff came out way better than I imaged, and doing the print as a standard color print versus printing in color to a full-sheet label, where the overall quality level drops a bit.
You can see the results below.
If you want to take this route, here is what I've learned below. I don't know the longevity of this lamilabel stuff, but it seems like it might be a decent solution. I put it straight onto the main stick artwork without taking it off, which I think will be a better idea then trying to take off the stock art. The stock art allows for peeling over the lamilabel if you want to, so that way you could easily swap out to a different image at a later date.
* Don't use the template as it current stands in regards to edges. Cutting to the set edges and then trying to get it to perfectly line up on the face is a real bitch. (As you can see in my photos below.) What I'm going to do is extend the edges a bit, cut to that size, stick the sticker on, and then do trimming there. Since the joystick's body by nature has a bit of a groove / edge around the face artwork, this worked well for the bit of trimming that I did do. So I think that for both the outer edge and around the controls, I'm going to try again, have it be a bit bigger than it should be, then trim afterwards for better results.
* Take off the white circles for where the buttons go. Keep the artwork full there, stick this on to the case, and then trim the button holes from the inside out. That way, your cuts will be perfect, it'll be far easier to cut out, and you know for certain that you'll have no white area on the artwork under your buttons.
Anyhow, as I said, I'm going to try another attempt at printing and putting on the artwork. Then I'll just need to order new buttons and a stick.
AgentOtaku
Member
Excellent work Shidoshi!
- Status
- Not open for further replies.